An LED display is more than just a communication tool—it’s an investment in visibility, branding, and audience engagement. Whether installed in a retail store, a corporate lobby, or an outdoor façade, LED screens deliver high-impact visuals that capture attention. However, like any technology, they require regular maintenance to ensure long-term performance and reliability.
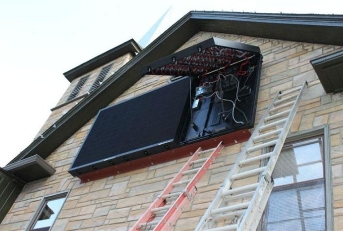
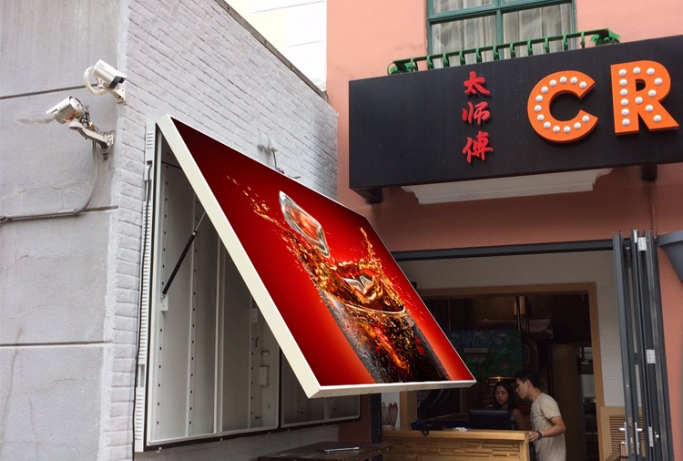
Front access LED displays have made the maintenance process much more convenient. Unlike traditional rear-maintenance screens that require extra space behind the display, front access models allow technicians to perform servicing directly from the front. This is especially beneficial for wall-mounted and space-constrained installations.
In this guide, we’ll provide a step-by-step approach to maintaining your front access LED display efficiently, covering everything from preparation to common mistakes to avoid.
Before diving into maintenance, it’s important to understand what makes front access LED displays different.
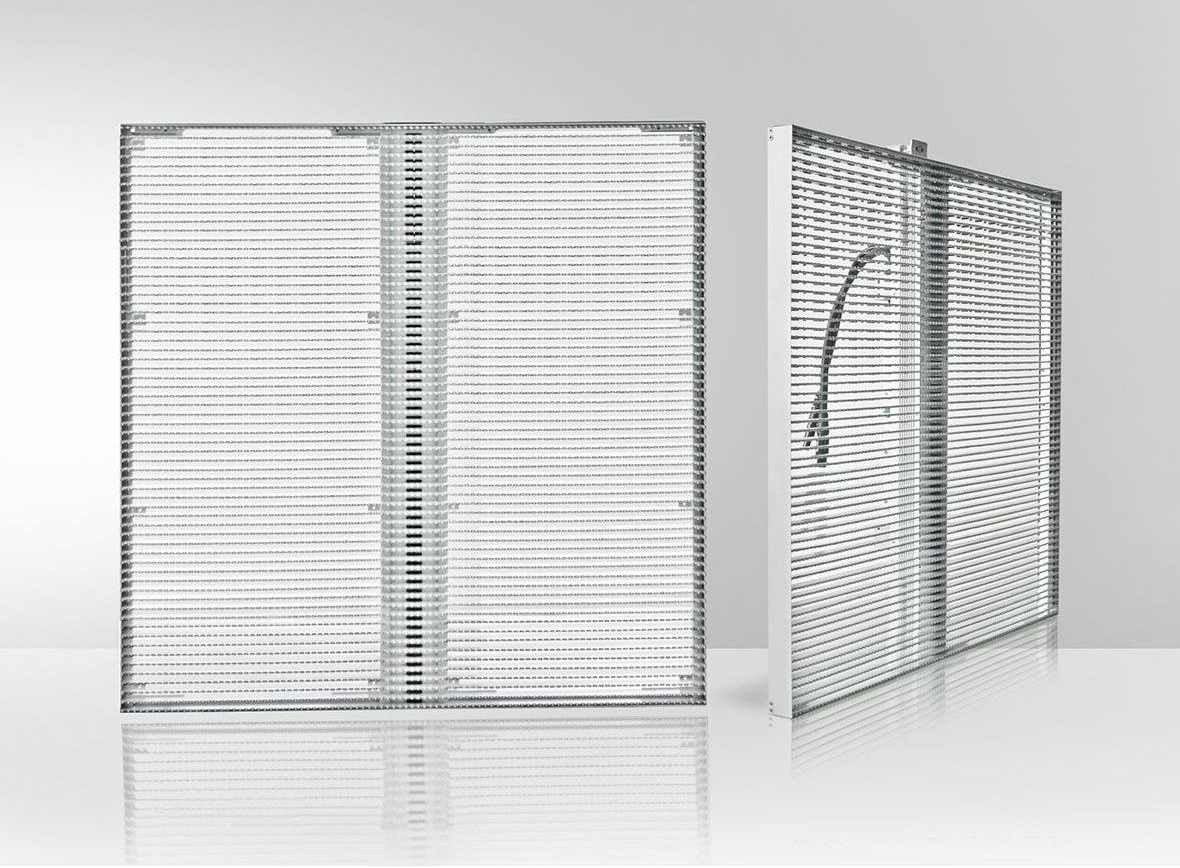
Definition: A front access LED display is designed so that LED modules, power supplies, and receiving cards can be accessed from the front side. This is usually achieved through magnetic modules and specialized tools.
Advantages:
Saves space since no rear clearance is required.
Enables flush, wall-mounted installations for a clean look.
Simplifies servicing, reducing downtime and labor costs.
Applications: These displays are commonly used in shopping malls, corporate offices, control rooms, museums, event venues, and building facades where rear access is limited or impossible.
Because of this design, maintenance becomes quicker and more efficient—but only if done systematically.
Maintaining an LED display efficiently starts with preparation. Having the right tools and following proper safety measures ensures smooth servicing without damaging components.
Magnetic service tool (for removing modules).
Anti-static gloves and wrist straps (to prevent static damage).
Screwdrivers and tightening tools (for connections).
Microfiber cloths (for cleaning).
Approved cleaning solution (non-corrosive, alcohol-based).
Always disconnect the power before servicing.
Use anti-static protection when handling electronic components.
Ensure proper grounding of the display system.
Back up your content and settings before powering down.
Schedule maintenance during non-peak hours to avoid interruptions.
Establish a maintenance log to track inspections and repairs.
Now, let’s break down the maintenance process into actionable steps.
Always begin by shutting down the LED display and disconnecting it from the main power source. If the system is connected to backup power supplies or UPS systems, make sure these are also isolated. This prevents electrical hazards and protects sensitive components.
Stand in front of the display and look for obvious issues:
Loose or misaligned LED modules.
Cracked or damaged surfaces.
Dust buildup or debris around the screen edges.
Signs of moisture intrusion in outdoor displays.
This initial check often highlights potential problems before they escalate.
Dust and dirt can accumulate over time, affecting both brightness and heat dissipation. To clean properly:
Use a soft microfiber cloth to wipe the surface gently.
Apply an approved cleaning solution if necessary.
Avoid using water sprays or harsh chemicals, as these can damage LED modules.
Tip: For outdoor displays, schedule cleaning more frequently to counteract environmental factors like rain, dust, and pollution.
Front access LED displays are designed with removable modules. Using a magnetic tool:
Remove modules that appear dim, discolored, or inactive.
Inspect for dead pixels or irregular brightness.
Replace faulty modules immediately to maintain visual uniformity.
It’s best to keep spare modules in stock for quick replacements.
Behind the LED modules, you’ll find critical components such as power supplies, receiving cards, and cabling.
Check that all connections are secure.
Look for signs of wear, corrosion, or loose wires.
Ensure power supplies are functioning correctly.
If a component seems unstable, it’s better to replace it early than risk a full system failure.
Once hardware is inspected, turn the display back on and check software performance:
Test playback of videos, animations, or content loops.
Run a calibration process to ensure uniform brightness and color across all modules.
Update display management software or firmware to the latest version.
Proper calibration ensures the audience sees a consistent, high-quality image.
Let the display operate for several hours after maintenance to confirm stability.
Watch for flickering, delays, or abnormal color shifts.
Verify that content plays smoothly and brightness levels are balanced.
This final step gives confidence that the system is ready for long-term use without unexpected failures.
Beyond routine steps, following these best practices will maximize the lifespan and efficiency of your front access LED display:
Set a Regular Maintenance Schedule
Daily: Quick visual inspection.
Monthly: Surface cleaning and brightness check.
Quarterly: Full inspection of modules, power supplies, and connections.
Keep Spare Parts On Hand
Having extra modules and power supplies ensures minimal downtime when issues arise.
Train Staff or Hire Professionals
Routine cleaning can be handled by staff, but technical inspections should be done by certified technicians to prevent mishandling.
Maintain Proper Environment
Ensure good ventilation, air conditioning, or dehumidifiers if needed. Overheating and humidity are two of the biggest threats to LED performance.
Document Maintenance Activities
Logging inspections, repairs, and replacements helps track patterns and predict future issues.
Even with good intentions, some mistakes can shorten the lifespan of your LED display:
Skipping Regular Cleaning: Dust reduces brightness and blocks heat dissipation.
Using Harsh Chemicals: Strong cleaners can corrode module surfaces.
Ignoring Software Updates: Outdated firmware can cause performance instability.
Neglecting Anti-Static Protection: Static discharge can damage sensitive electronic components.
Delaying Small Repairs: A single faulty module can lead to cascading issues if not addressed promptly.
Avoiding these pitfalls ensures your display remains reliable and visually impressive.
Maintaining a front access LED display doesn’t have to be complicated. With the right tools, safety precautions, and a systematic approach, you can keep your display operating efficiently for years.
The steps are straightforward: power down, inspect, clean, check modules, verify components, calibrate software, and run final checks. Coupled with a consistent maintenance schedule and attention to detail, these practices will extend the lifespan of your display, reduce downtime, and ensure a consistently engaging visual experience.
For businesses and organizations looking to maximize the value of their LED display investment, working with an experienced partner makes all the difference. Hongwei LED Display provides high-quality front access LED solutions along with expert guidance on installation, maintenance, and long-term performance—helping clients achieve brilliant results with confidence.
By continuing to use the site you agree to our privacy policy Terms and Conditions.